Total Distance: 108 km
Return Time: 7 - 9 days
Elevation Gain: 4730 m
Difficulty: Difficult
Region: Kluane
Traditional Territory: WRFN, KFN
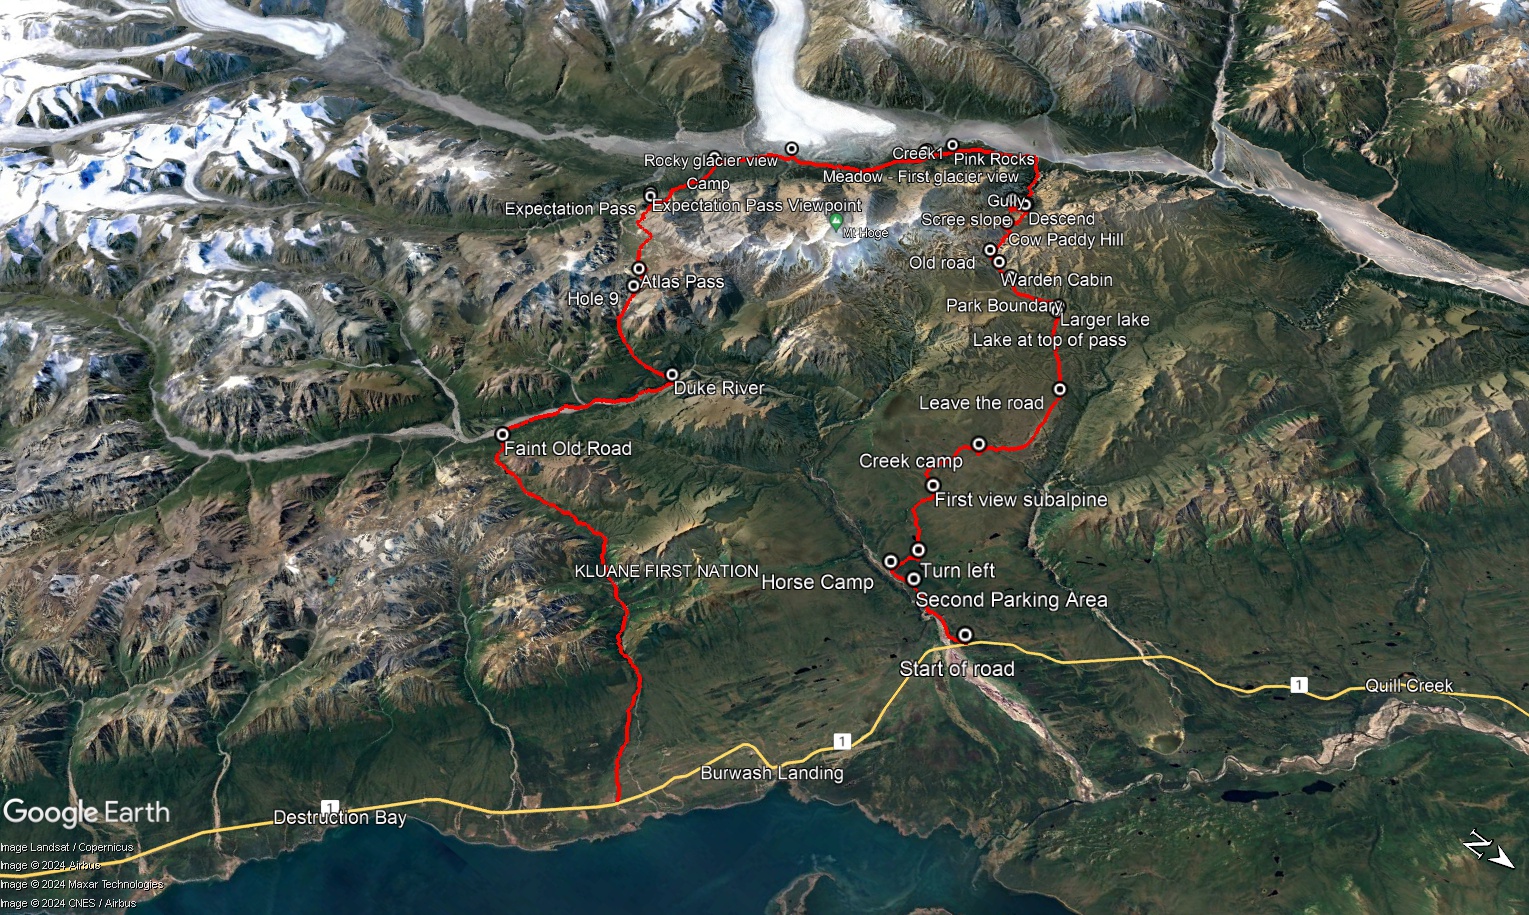
The Dän Zhùr (Donjek) route is a challenging multi-day hike that crosses a variety of terrain: tussock plateaus, mountain passes, glacier viewing and numerous creek and river crossings. The mighty Donjek Glacier near the halfway point of this route is a highlight. Weather is a major factor on this hike, which affects water levels for creek crossings.
The route is a partial loop, and the start and end of the route are 16 km apart on the Alaska Highway near Destruction Bay and Burwash Landing. Destruction Bay is 106 km from Haines Junction, heading north on the Alaska Highway. The end of the route is 10 km north of Destruction Bay. If you are planning to leave a vehicle or a bike, this is the place. The start of the route is 16 km north from there, or 10 km north of Burwash Landing. As soon as you cross the Duke River bridge, look for a road on your left. There is a Parks Canada interpretive sign about the Donjek Route as soon as you turn off the highway.
NOTE: This hike is mostly within Kluane National Park. Parks Canada requires registration for any backcountry overnight trips in the park.
The typical direction to hike the Dän Zhùr route, is from north to south (from further up the Alaska Highway). Since it is not a circle loop, you will need to plan to either get dropped off at the start, have two vehicles, hitchhike, or hike back to your vehicle. The route starts and ends along the Alaska Highway, and the distance in between is about 16 km.
You can drive a few kilometres up both the start and end of the route along old roads. How far you can drive will depend on your vehicle and road conditions.
At the starting point (the north side), you can either park 2 km up the road at a small pullout, or attempt to go as far as 3 km at another pullout. Any further and you could risk getting stuck.
OLD ROAD
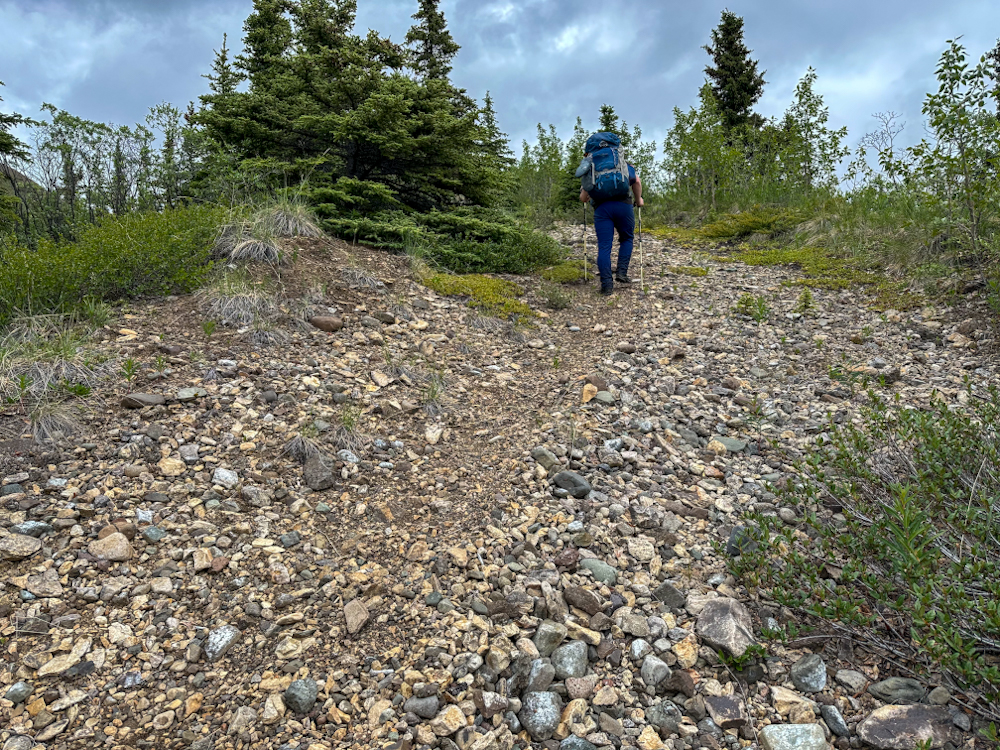
Once you start hiking, you will be following a road to an old horse camp. The camp is 5.4 km from the Alaska Highway. At the camp, you will turn right and follow the road as it climbs steadily up to the subalpine. Just over 1 km from the camp, you will make a sharp left turn. You will gain 323 m over 4.6 km, and with a heavy pack, will welcome reaching the subalpine and its relative flatness.
Continue following the road. Hoge Peak (and glacier) and Amphitheater Mountain will come into view. The first best campsite is 8.3 km from the camp (13.7 km from the highway) at a small creek crossing. There are some flat areas for pitching a tent near the creek. Note that there is evidence of larger camping areas 500 m before the creek, but it is quite a ways to get water. If you decide to camp further than the creek, you will likely have to camp directly on the road as there isn't much flat ground in the tussocks of the Burwash Uplands.
From the creek, continue following the road. It is lined with tall willows, partially obstructing the view, and potential animals, so continue to make lots of noise. There are small ponds along the way if you are desperate for water.
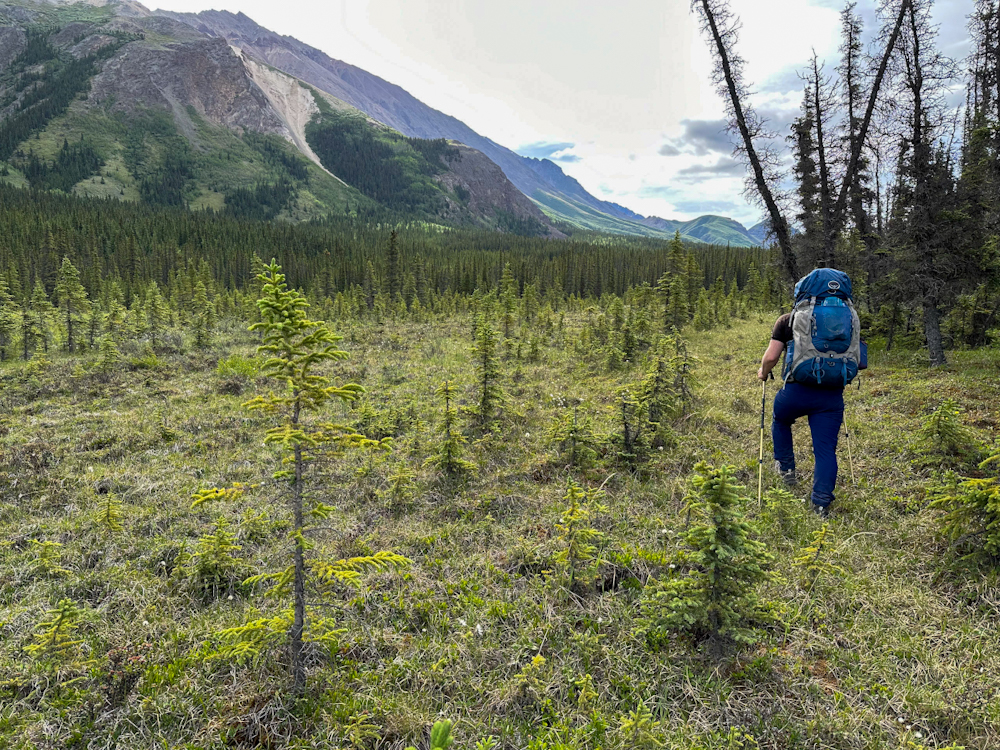
BURWASH UPLANDS
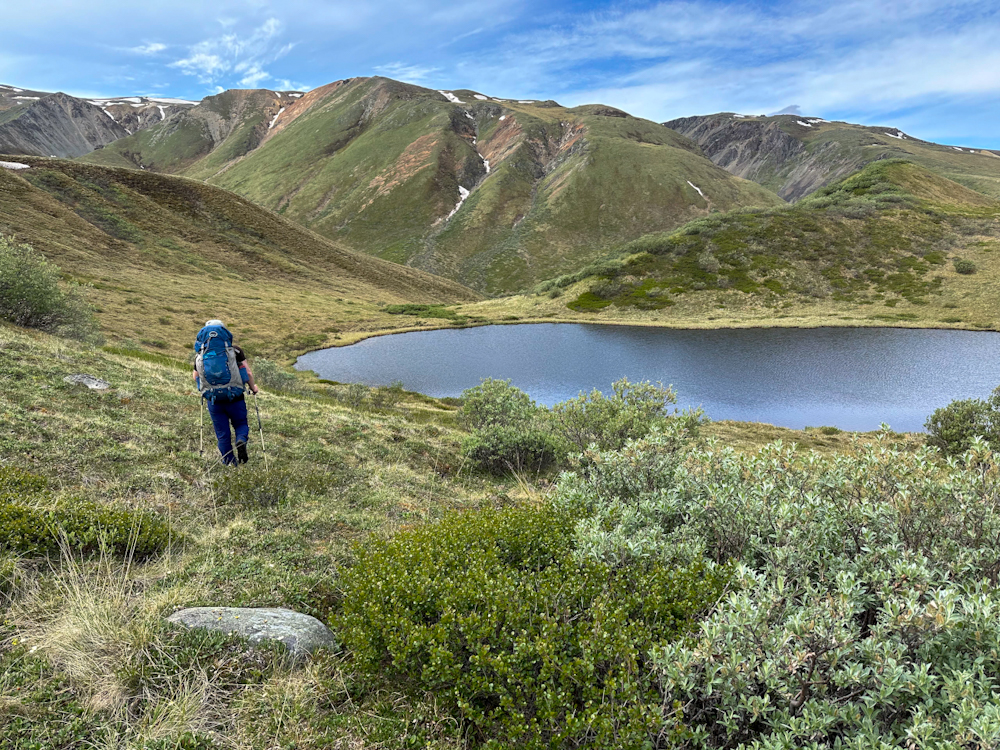
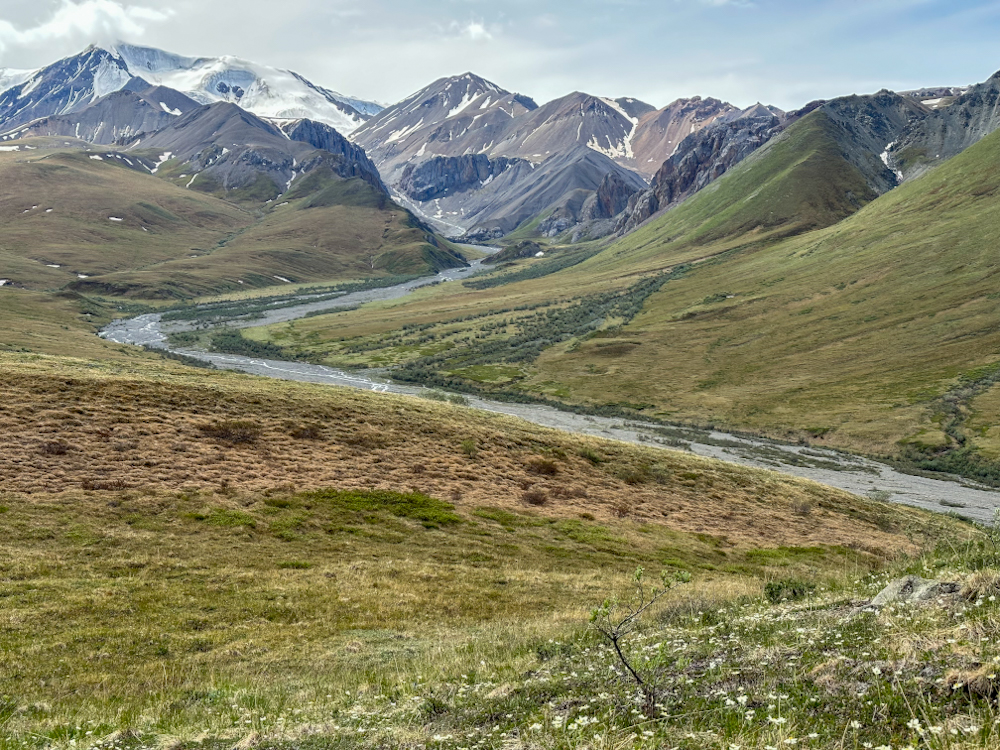
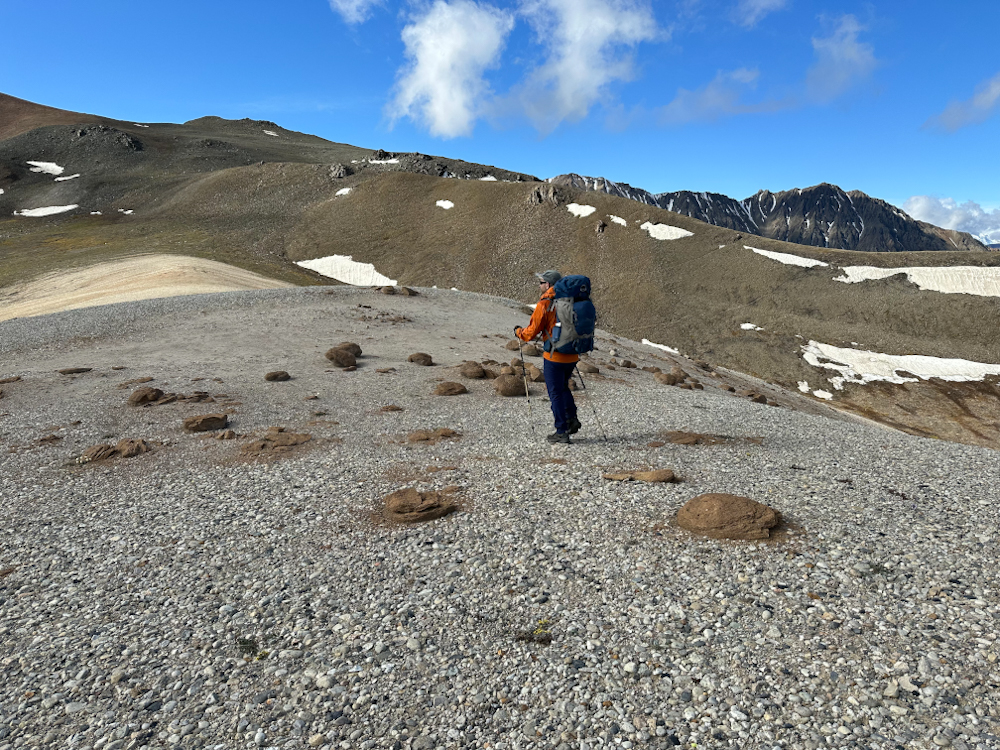
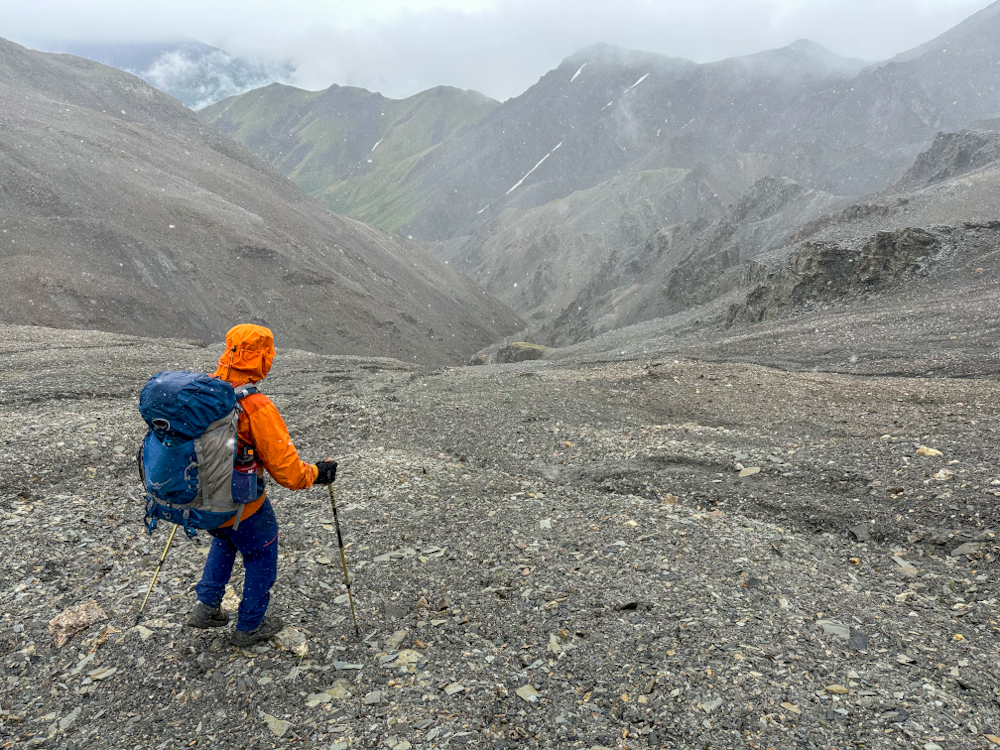
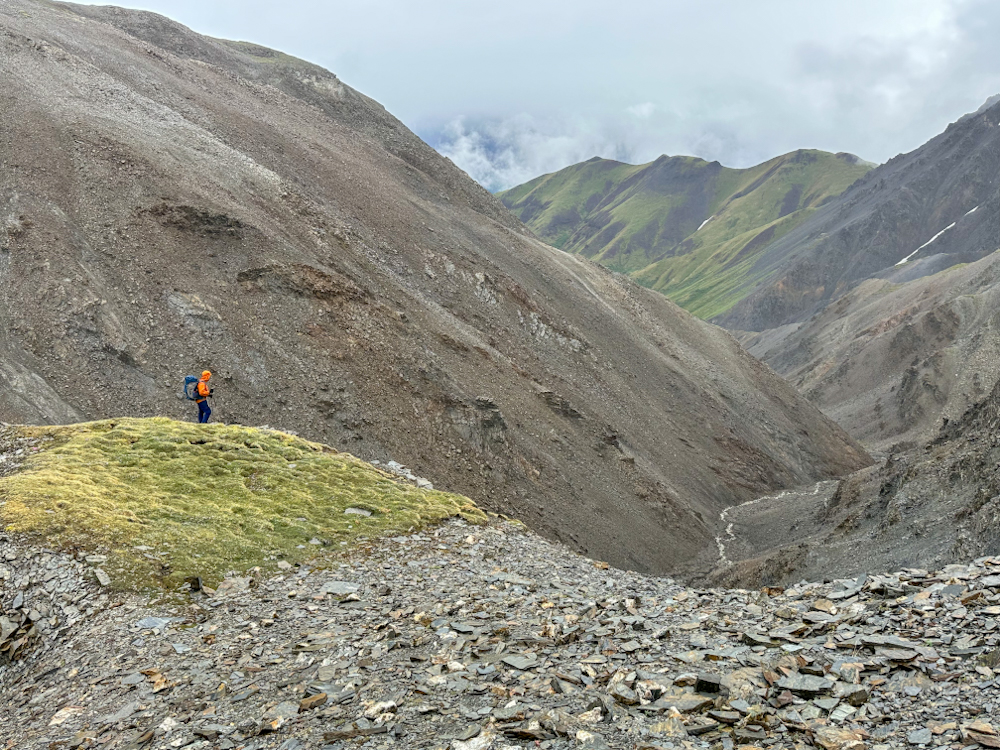
5 km from the creek, the road will make an abrupt right turn (north) and become more overgrown. This is the point to leave the road and continue across the tussocks of the Burwash Uplands. Once on the tussocks, you'll want to make a straight line across. In the distance there are a few hills, and you can aim for roughly the middle of them to a low pass. As you hike towards them, there is one large dip in the terrain where you will have to lose elevation and then gain it again. After the dip, you will reach the hills and a couple of alpine lakes, where you will get a view of Burwash Creek, your next objective.
BURWASH CREEK AND WARDEN CABIN
From the hills and lakes, descend straight down to Burwash Creek. Follow the rocky creek bed south. You will have to cross the creek at some point, so look for a good place to cross once you are a little ways down. At the first major bend in the creek, you can either continue following the creek bed, or get onto the vegetation again. There are Park Boundary signs on the flat vegetated area on the west side of the creek and a faint trail. This area is wide and flat and you could set up a tent here. Up ahead, there are some distinct rocky towers. Head for these towering rocks and you will find the warden cabin. The cabin is usually locked unless a warden is present. There aren't many flat areas to pitch a tent near the cabin, except a few places along the creek bed and some higher up on the vegetation.
HOGE PASS ASCENT
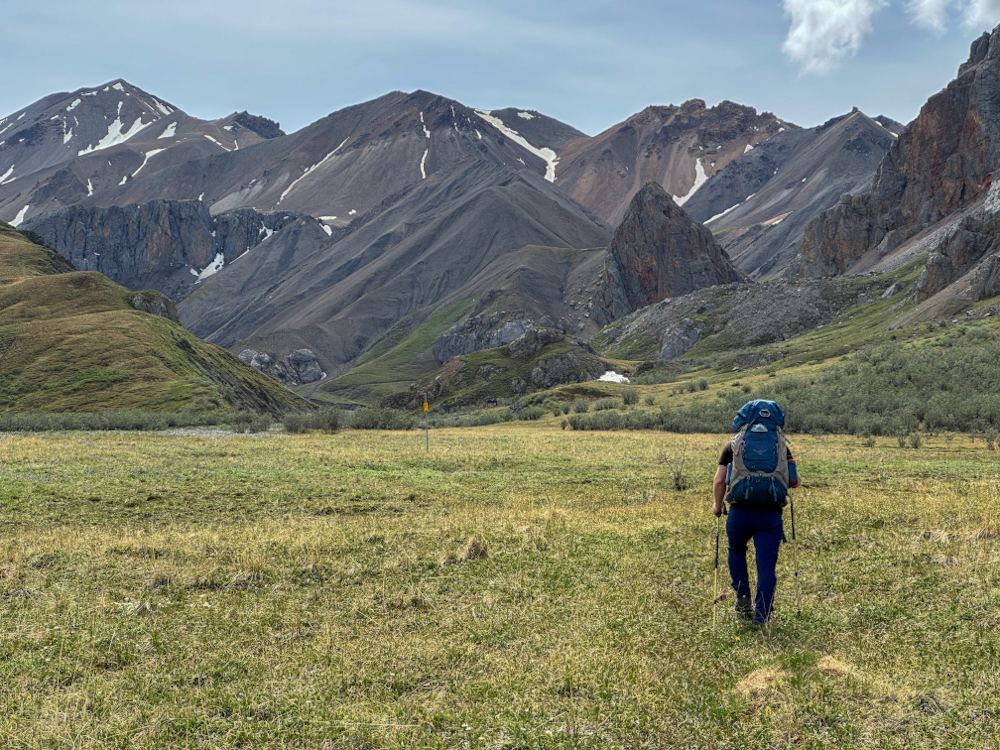
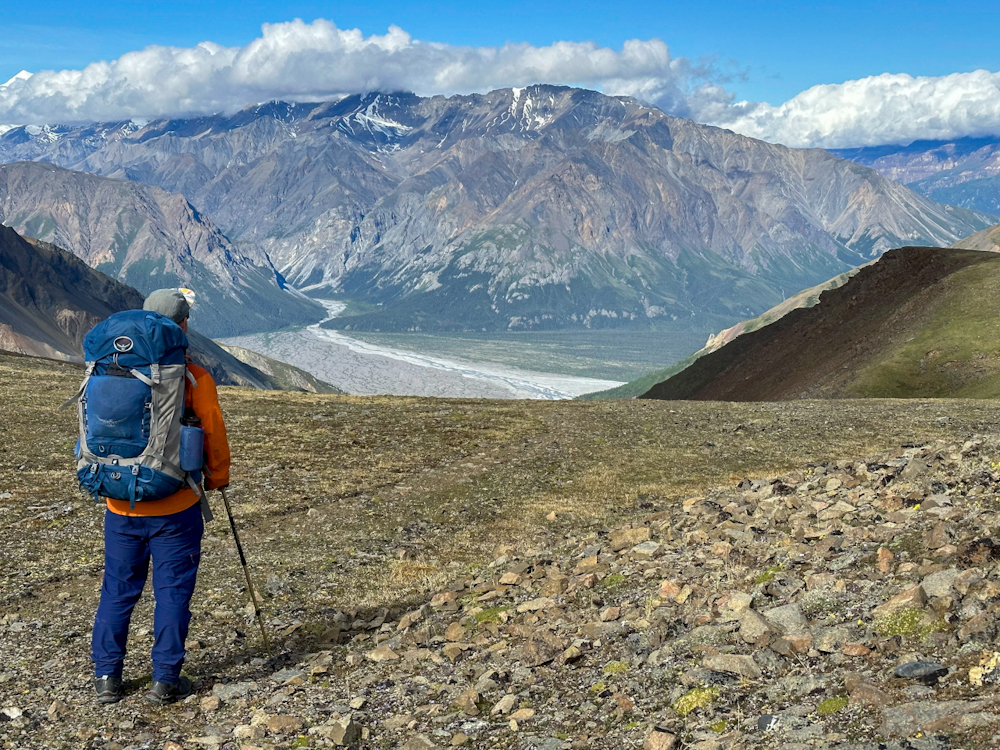
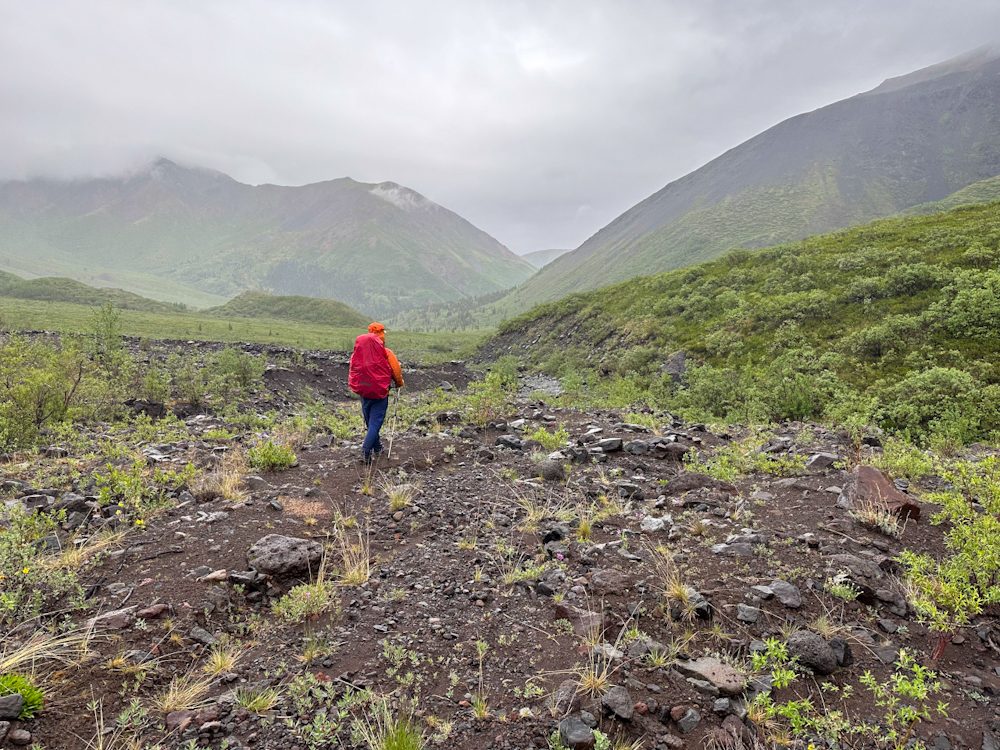
From the warden cabin, you will be ascending 415 m of elevation gain to reach Hoge Pass. From the cabin continue along Burwash Creek for 700 m where you will reach another creek on your right. Follow this creek as it climbs steadily up. You will find the remnants of an old road on the left side of the creek a little ways up. Continue upwards towards Hoge Pass. You will first reach Cow Paddy Hill, a distinctive mound of light coloured rocks topped with irregular brown rock chunks that resemble cow paddies. Walk to the very end of Cow Paddy Hill before turning right and climbing the small ridge before the pass. At Hoge Pass, soak in the view of the Donjek River Valley. The view is overwhelming, mostly because your next objective is to get down to Hoge Creek from here, and this is no easy task.
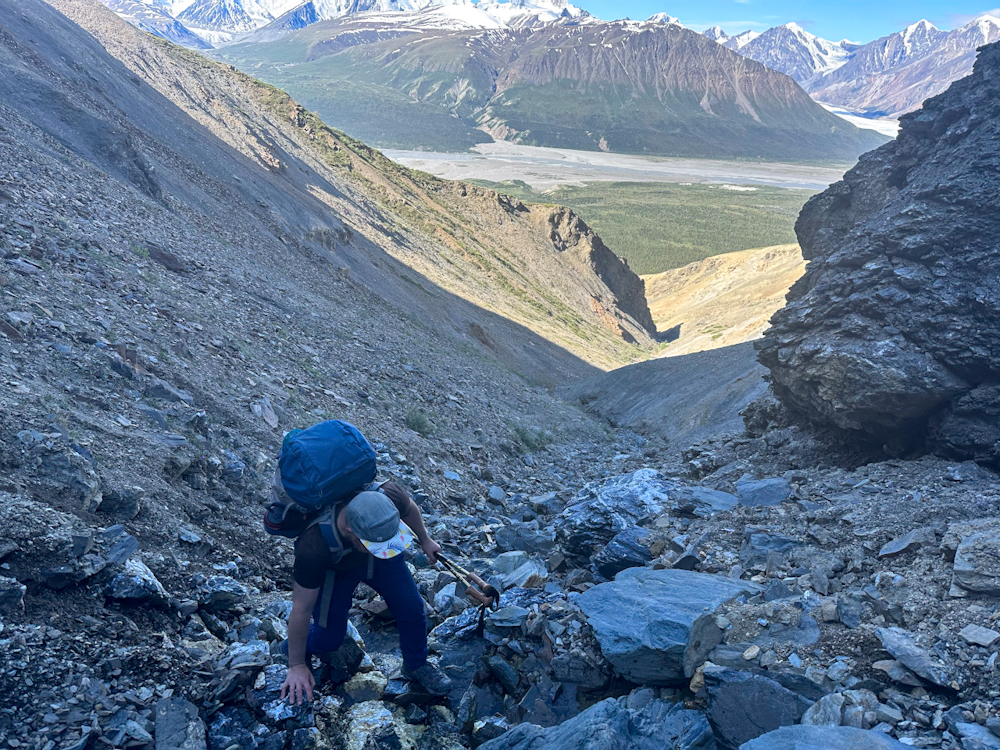
HOGE PASS DESCENT
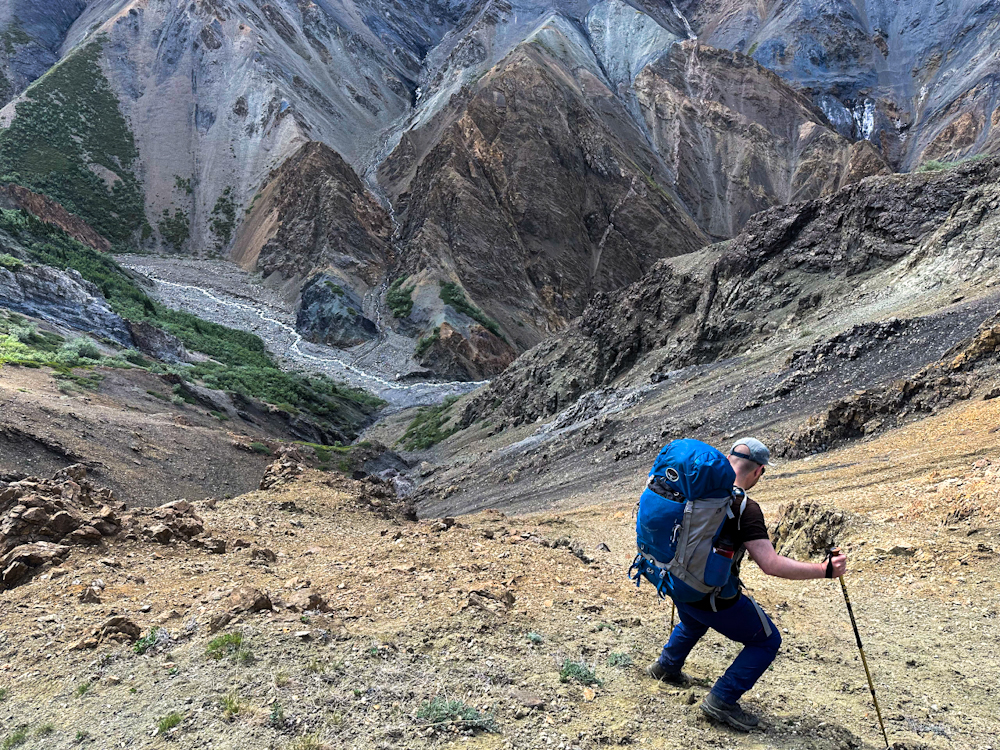
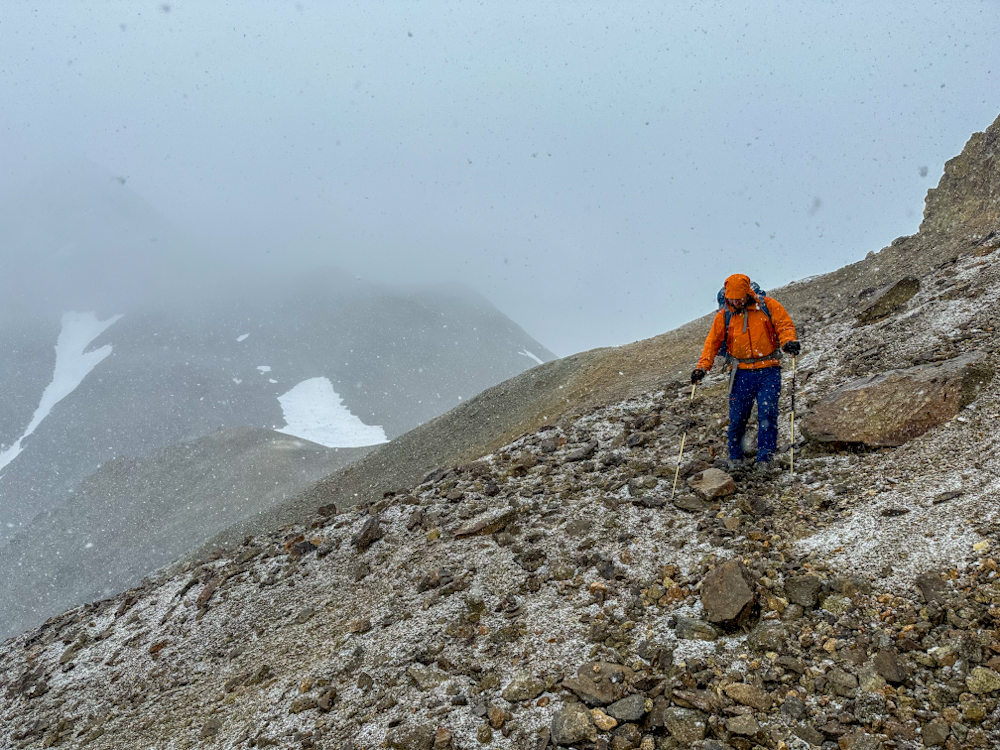
Now for one of the most challenging parts of the route - descending Hoge Pass. There are many gullies that lead down to Hoge Creek, and some are dangerously steep or end in cliffs. Conditions change each year due to permafrost melting and other weather conditions. Contact Parks Canada to discuss the best descent option for the season.
Once you descend down to Hoge Creek, you will follow it all the way down to the Donjek River. Note you will be dropping down 1,300 m elevation gain. If water levels are high, or there has been lots of rain, it is best to descend as early in the day as possible. Depending on the weather, you can expect no creek crossings during the driest times, several creek crossings in a typical season, or an impassible creek in extremely high water situations.
Just before you reach the Donjek River, there are some flat camping spots near the forest on the right side of Hoge Creek.
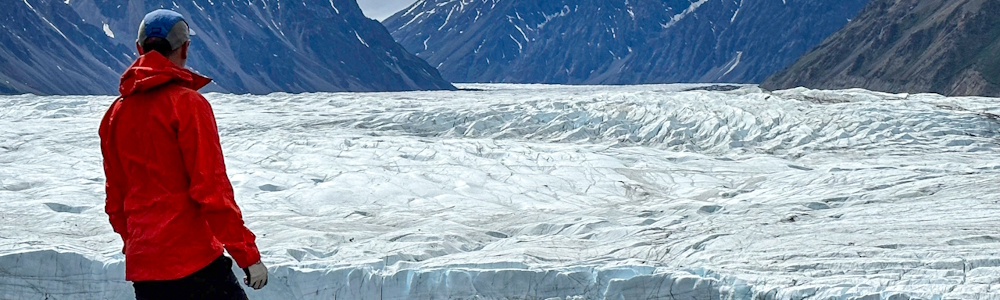
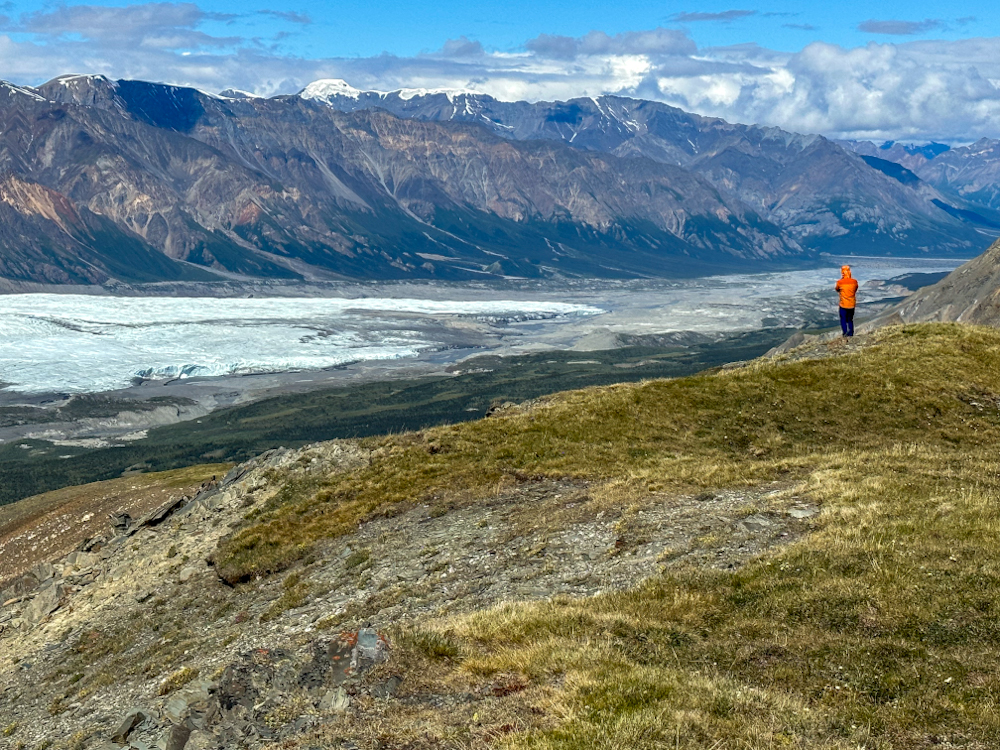
DONJEK GLACIER
From the confluence of Hoge Creek and the Donjek River, you will be hiking south (left). The path of the Donjek River changes every year, so the best route is to follow the bank next to the Donjek River for 500 m, then ascend into the forest. The GPS route is incredibly handy at this point. Pick your way through the forest for 1 km until you reach an open meadow and an old horse trail. You will be following this rough horse trail for the next 11 km, so make sure you don't lose it. The route moves through several meadows, creek crossings, and thick brush.
After following the horse trail for about 11 km, you can leave the trail and head directly to a view of the Donjek Glacier from atop a rocky area. You can camp back in the vegetation in this area.
From the Donjek Glacier view, descend down to the wide creek drainage below. Follow along the Donjek River for 1 km until you are forced to climb up to the bank above to your left. Following along the bank for about 1 km, you will eventually reach an area of unstable mud flats where water has carved trenches through. Pick your way through this area to the forest on the other side. The forest is fairly open and there are animal trails you can pick up through it. The forest opens up even more, with marshy pools and stunted trees. You will reach a major creek bed, 4 km after the Donjek Glacier view. There are several good places to pitch a tent on the flat ground above the creek bed.
EXPECTATION PASS
There are two ways to get to Atlas Pass: via Expectation Pass or Bighorn Creek. The description here describes the route via Expectation Pass. It is just under 700 m elevation gain to climb to the pass.
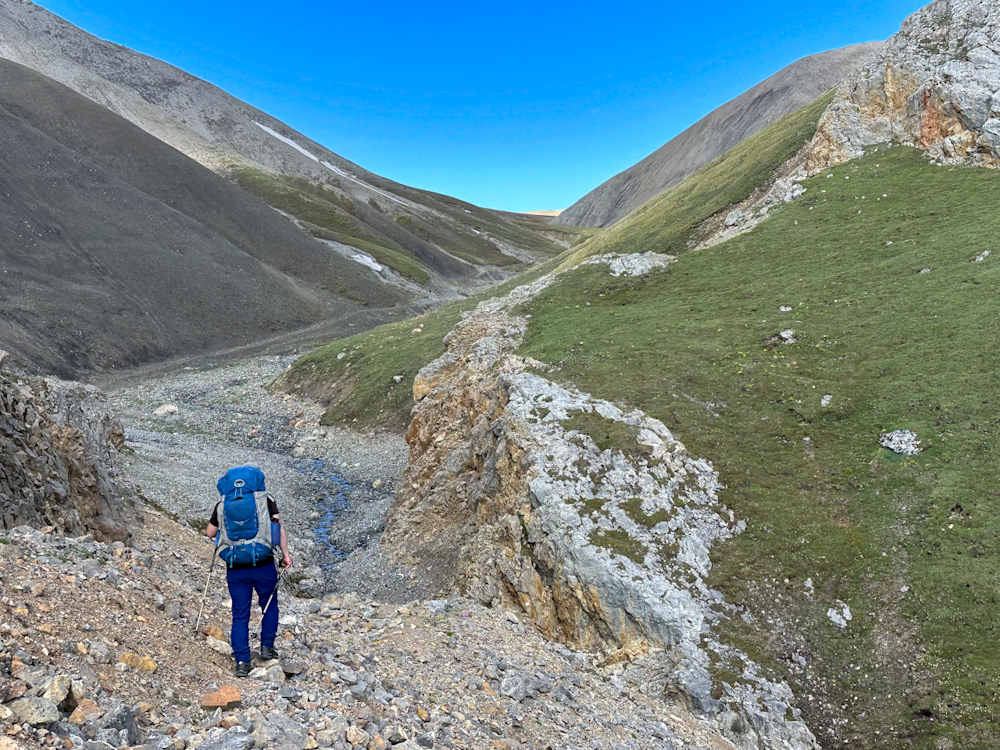
Follow the major creek bed upstream for about 1.5 km, until it makes a bend towards the northeast. Leave the creek bed and enter the forest. Pick your way through the forest, heading towards the base of the nearest ridge in the distance, where a small creek flows. Once you reach the creek, you will follow it up to its source in the alpine at Expectation Pass. While you are hiking up the small creek, stay right at any junctions. As you climb, there are a few slippery sections where the creek gets steeper. Move slowly through these sections. After the steep sections, stay to the right on the vegetation and you will reach Expectation Pass. A quick side trip up the ridge to the south offers great views back towards the Donjek Glacier and valley.
From Expectation Pass, you will be contouring to your left (northeast). You don't need to climb too high or descend too low, just contour where it feels comfortable. You will eventually reach a steep gully. There is a sheep trail that descends and then re-ascends this gully, and if you decide to take it, you must be confident with your footing and good with heights. Otherwise, a slightly longer but much safer detour is to head downwards until you can safely descend into the gully. Then cross the gully and ascend on a much less steep slope on the other side. This is the only main gully you will have to cross.
After the gully, continue hiking upwards until you reach a high point looking down at the next creek drainage. You'll see some interesting mounds in the distance. Your route from here is to descend to the creek bed, cross it, walk through the interesting mounds, and contour to your right around the light coloured ridge ahead.
Once you have contoured around the ridge, you will be looking up towards some cool rock formations and Atlas Pass is up to the right. Continue hiking up the gently sloped vegetation. There are a few places to camp here, before ascending Atlas Pass.
ATLAS PASS
The ascent to Atlas Pass is fairly gentle, though it is another 650 m elevation gain. The descent is not challenging from the pass, but requires following a specific route down. From the pass, head directly to your left and up towards some rocky spires on the ridge. When you are close to the towering cliffs, there is a trail that contours below them and over to a gentle ridge sloping down. Follow this broad, gentle ridge down to a striking patch of vegetation (known as Hole 9). Just past the green patch is a scree gully that you can follow down to Atlas Creek at the bottom. The gully requires some attention but isn't overly difficult. Follow Atlas Creek as it leads all the way downstream to the Duke River. You will lose 1,000 m elevation on the descent from Atlas Pass to the Duke River.
DUKE RIVER
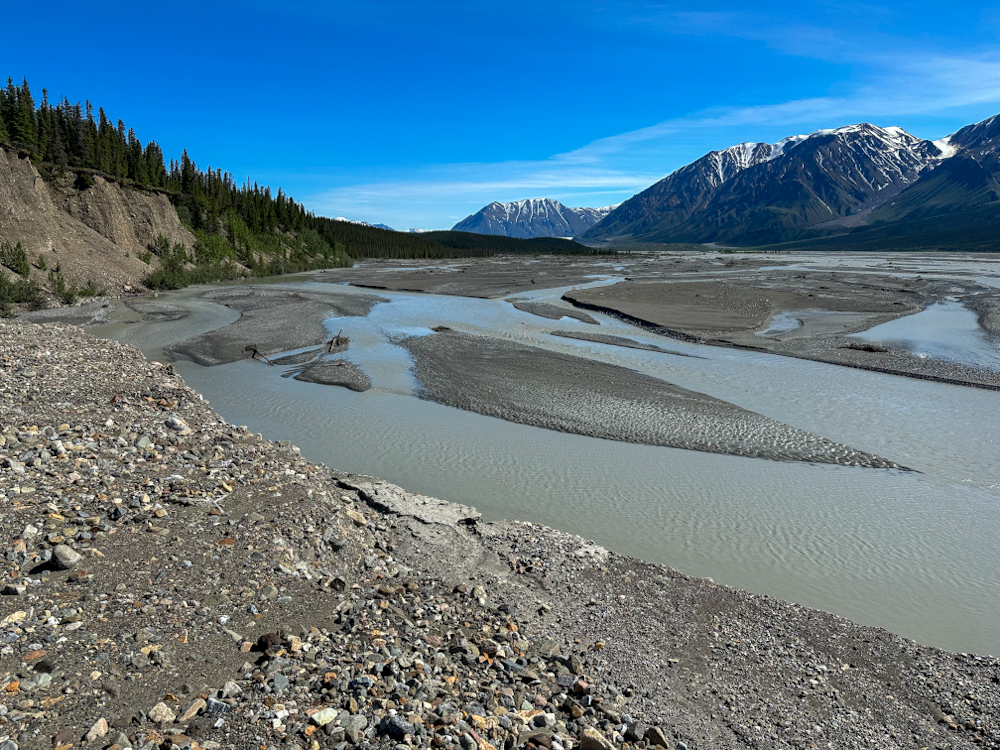
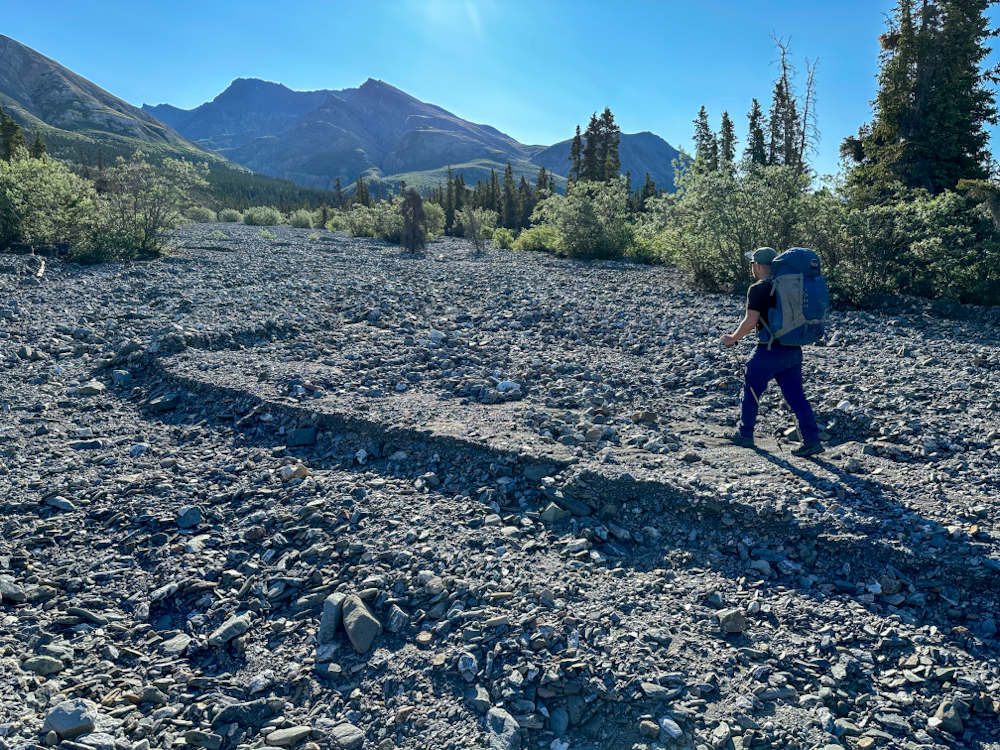
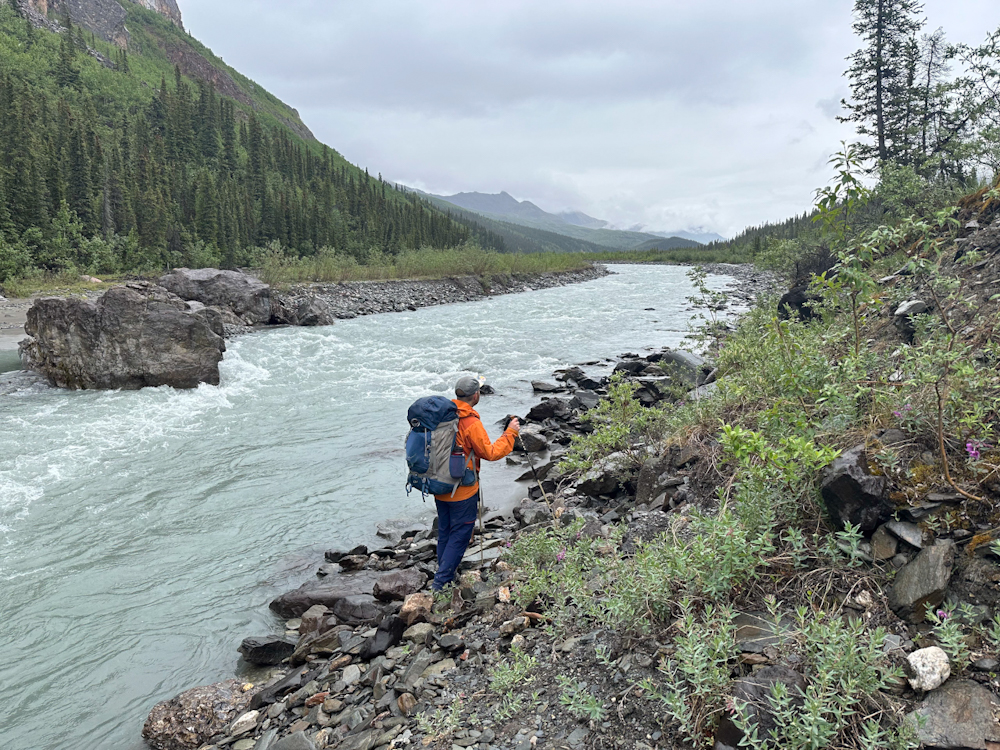
From the confluence of Atlas Creek and the Duke River, follow the Duke River to your right. Depending on the water level of the Duke River, you will be alternating between walking along the beach and bushwhacking through the forest. After about 5.2 km, the river braids enough that it is one of the better places to attempt to cross. At times, the river may be too high to safely cross, especially after heavy rain, which would require you to wait (potentially a day or two) until water levels recede. When you are confident that you can cross safely, cross and then continue to follow along the opposite shore.
After roughly 2 km from the crossing, you'll find a large flat area with lichen. At the end of this flat area is a small alluvial fan. Hike up the alluvial fan and bushwhack straight up the forested slope. 600 m up the slope (130 m elevation gain), you will come across an old road. This is a welcome relief from the bushwhacking, and you can follow the old road for a ways, and then continue along well-worn animal trails. 1.8 km from the start of the old road will be Cache Lake. There is not a lot of flat ground to camp at Cache Lake, but you should be able to find a suitable spot next to the lake.
COPPER JOE CREEK
From Cache Lake, continue following the well-worn animal trail as it descends down towards Copper Joe Creek. The first 10 km is relatively easy walking, as the creek valley is wide and you won't have to cross the creek. However, down lower, the creek valley narrows, and you will have to alternate between bushwhacking and crossing the fast flowing creek. This last section will go on for quite some time, until you finally reach where the creek widens again, 3 km later. At this point, you can leave the creek and head up onto the vegetation, aiming towards the road. From where you leave the creek to the highway is 4 km.
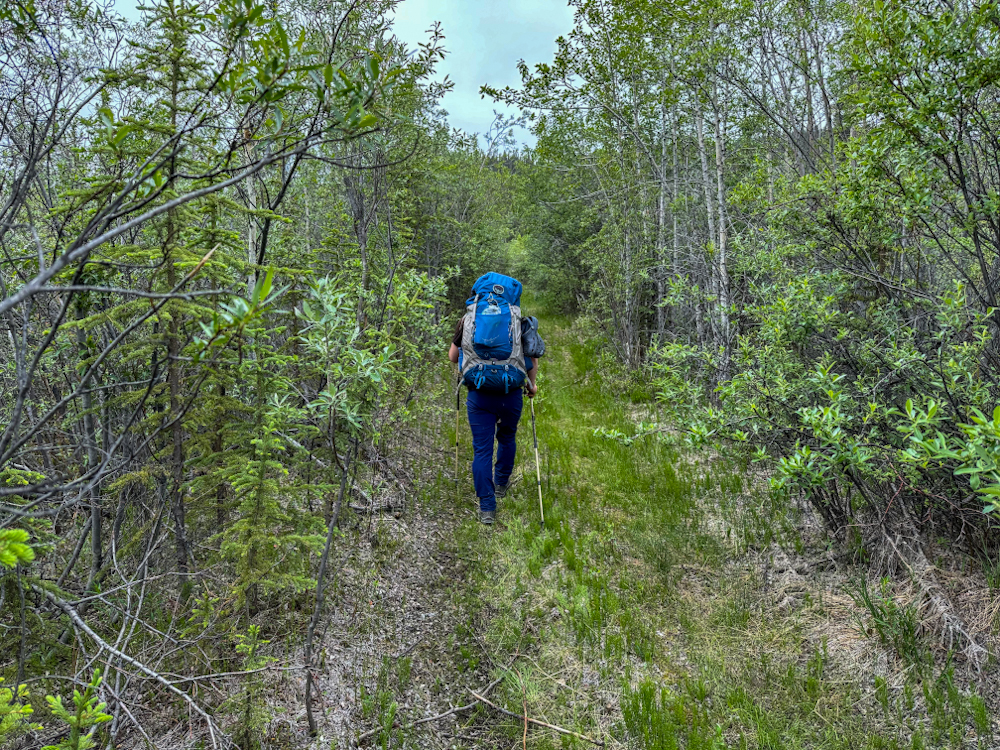
Hiking along the old road in the forest.
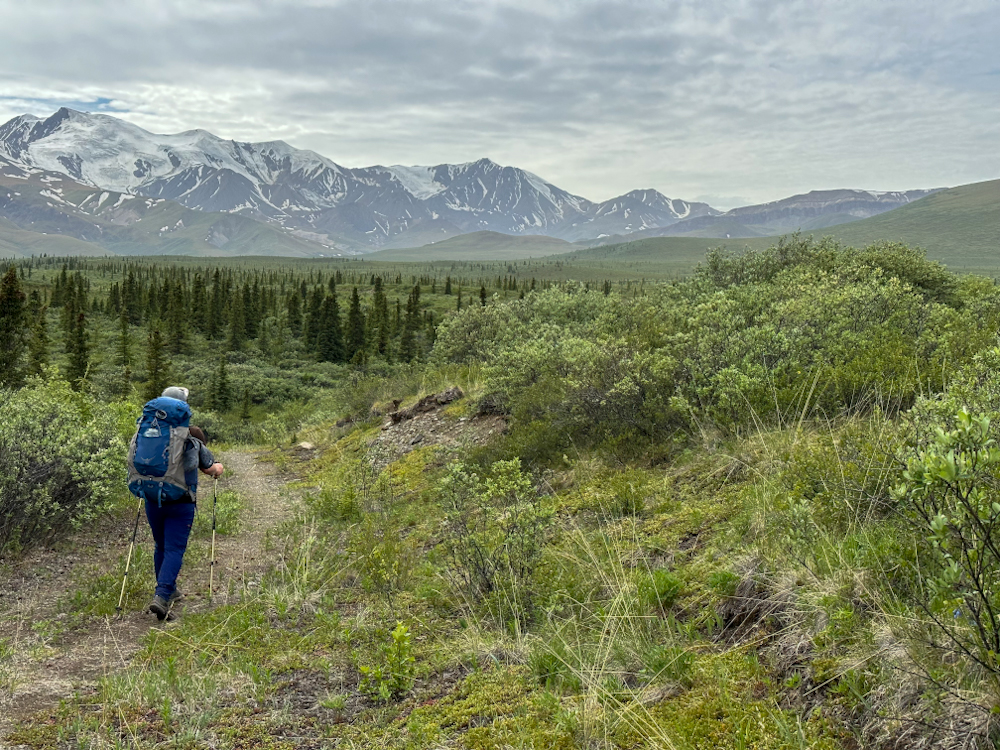
The first viewpoint along the trail in the subalpine.
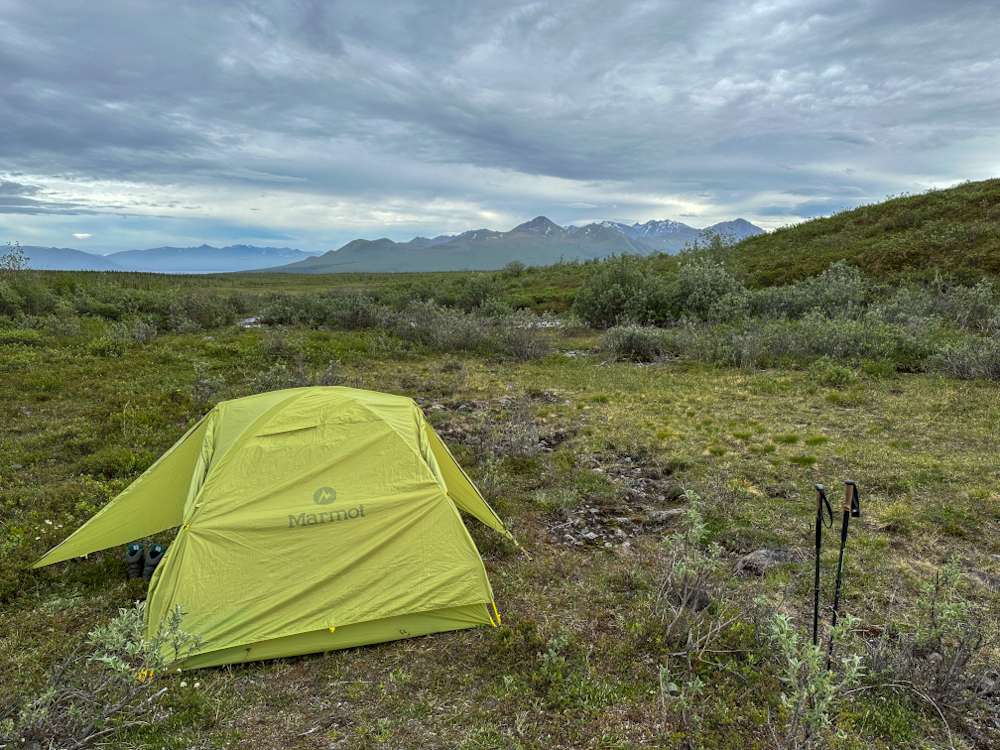
The camping area at the first creek crossing in the Burwash Uplands.
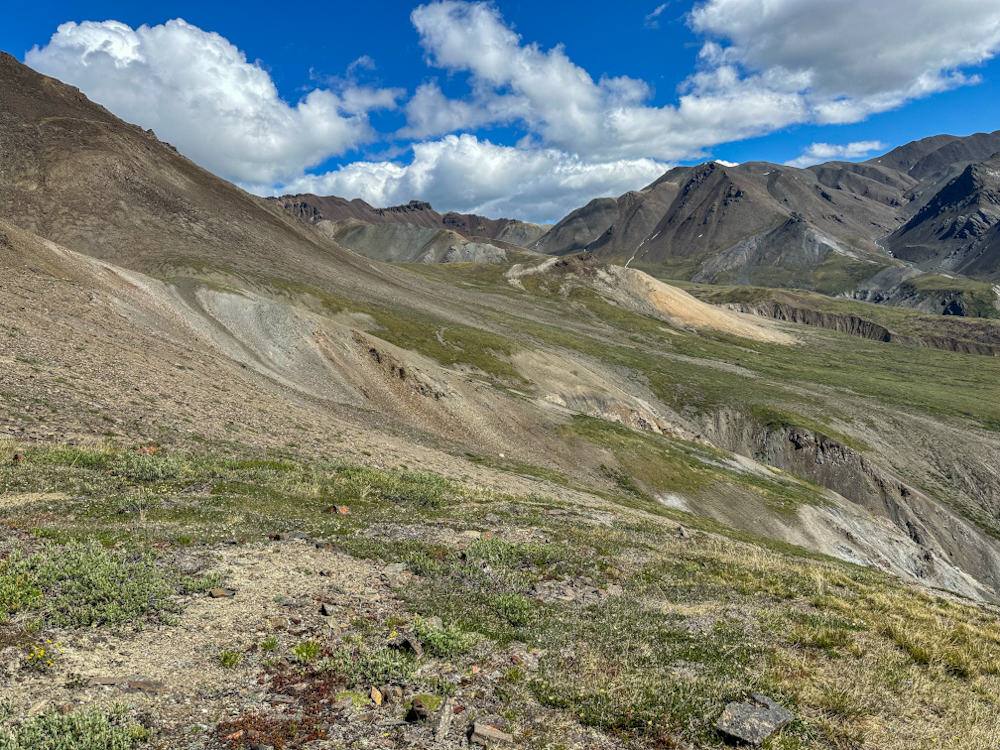
Hoge peak on the left and Ampitheater Mountain on the right.

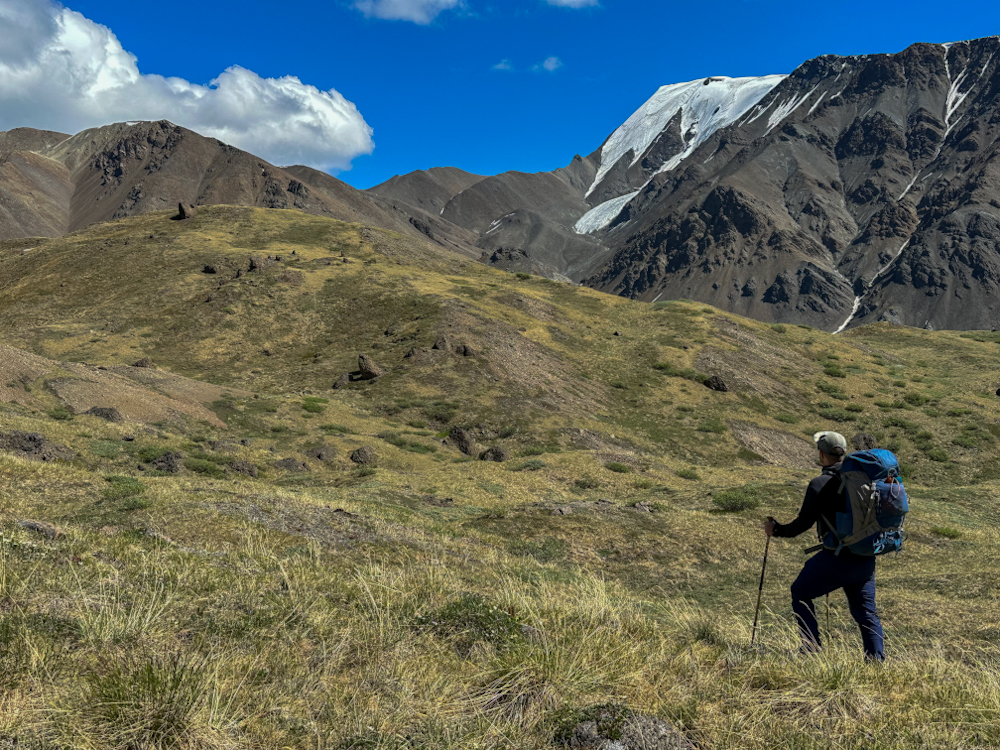
Hiking across the tussocks of the Burwash Uplands, heading for the lower ridge ahead.
An alpine lake on the lower ridge, just before the descent to Burwash Creek.
Looking up Burwash Creek. At the end of the visible creek is the warden cabin.
Hiking on the flat vegetation just before the Park boundary signs and warden cabin.
Looking towards the end of Burwash Creek from above the warden cabin. You will hike below the towering peak on the right, leading to Hoge Pass.

The warden cabin.
Hiking up the old road to Hoge Pass at the top.
Cow Paddy Hill. Hike to the end and turn right up the small ridge ahead.
The expansive view from Hoge Pass.
One of many gullies to choose from. Your objective is Hoge Creek at the bottom of the valley.
At the confluence of Hoge Creek and the Donjek River. From here, follow the river edge on the left until you can get into the forest.
The first meadow and the faint horse trail.

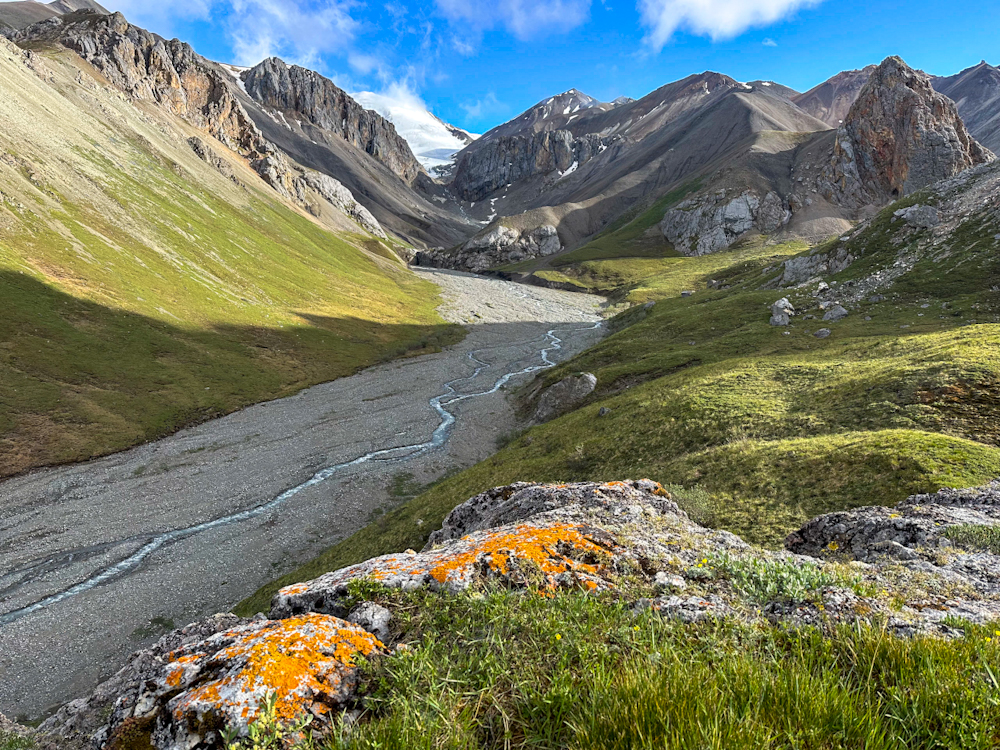
The mighty Donjek glacier.
Hiking up the creek bed towards the smaller creek that leads towards Expectation Pass.
Climbing up the small creek towards Expectation Pass.
The viewpoint above Expectation Pass back towards the Donjek glacier.
The major gully after Expectation Pass. You can descend down and cross at a lower section to avoid the steep sheep trail.
The interesting rock mounds on the way to Atlas Pass.
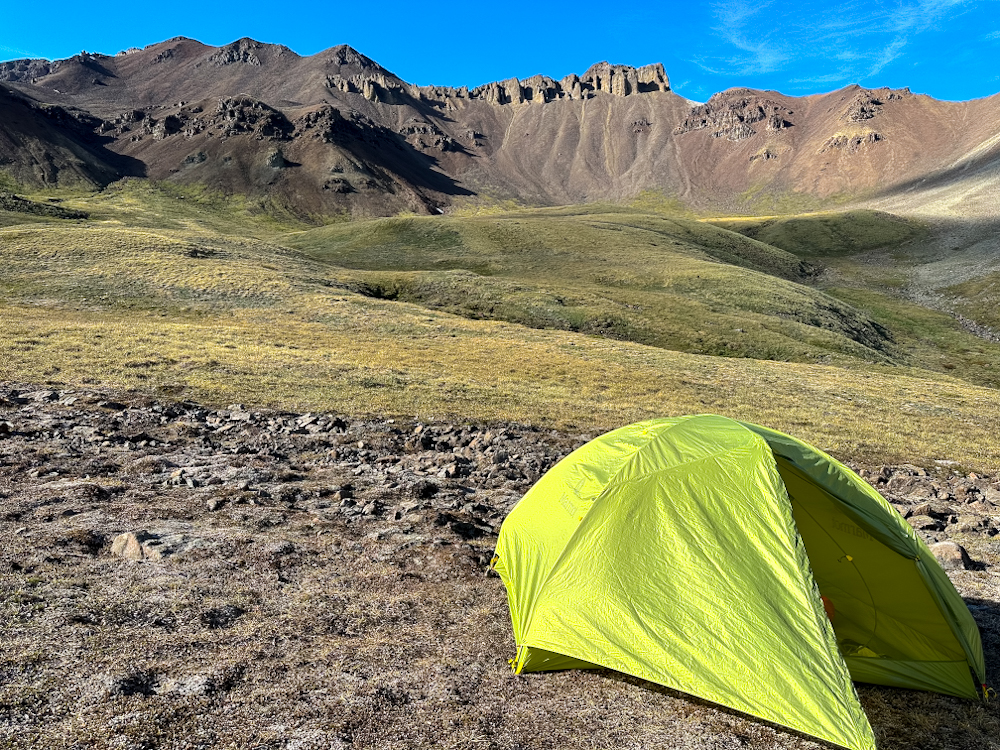
Camping just below Atlas Pass.
The faint trail from Atlas Pass over to the broad ridge.
Hiking down the broad ridge from Atlas Pass with Hole 9 vegetation down below.
Hole 9.
Looking up the Duke River from where Atlas Creek meets it.
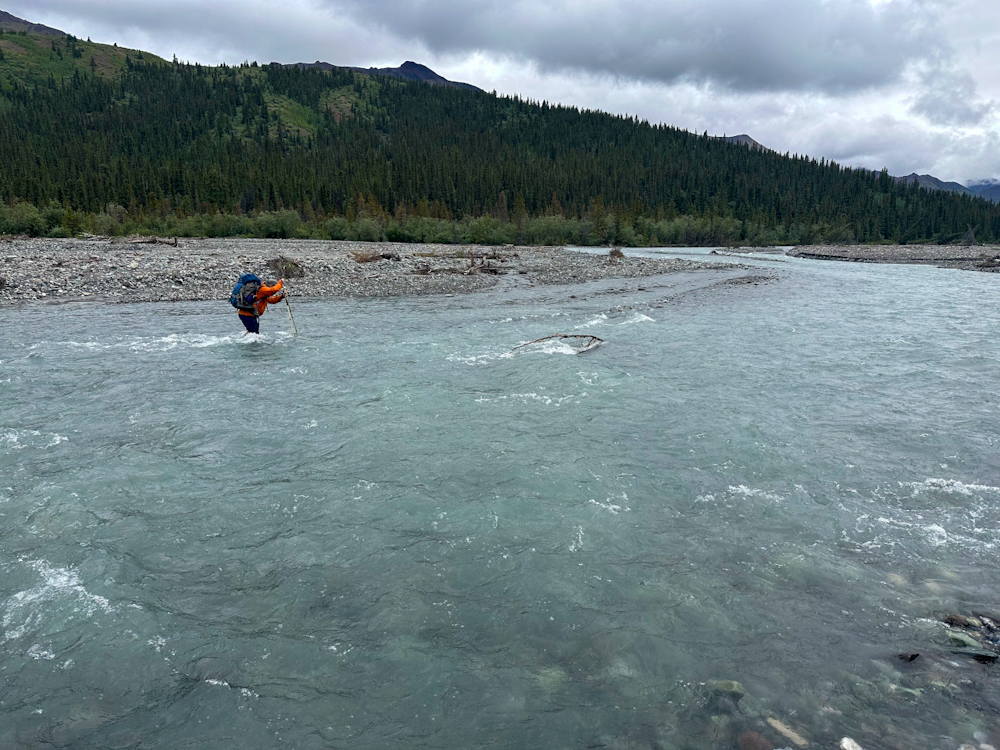
Crossing the Duke River.
The old road that will connect you to Cache Lake.
Cache Lake.
Hiking out Copper Joe Creek. The valley gets much more narrow down below.